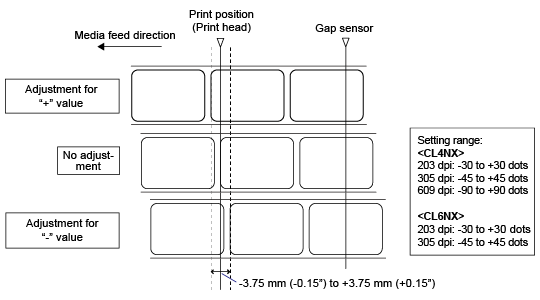
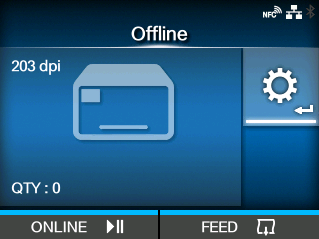
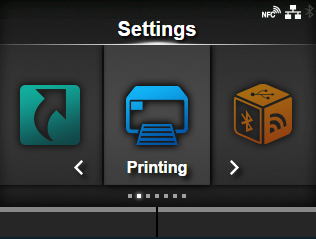
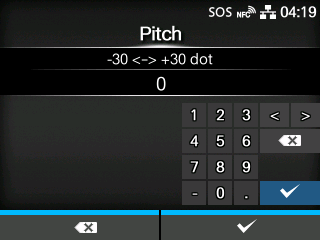
CL-NX Adjusting the Print Position Miho 16 May 2026 09:56 Updated Set the[Pitch]in the[Printing]>[Advanced]>[Adjustments]menu to adjust the print position. • The above reference position (print position) is the stop position when the media sensor type is set to Gap. 1. When the product is in Online mode, press thebutton on the operator panel to change to Offline mode. 2. Press thebutton to show the[Settings]menu. 3. Select[Printing]using the/buttons, and then press thebutton. 4. Select the[Advanced]>[Adjustments]>[Pitch]menu using the/buttons, and then press thebutton. The[Pitch]screen appears. 5. Change the setting value. Press the///buttons to select a number and then press thebutton to enter the number to the text box. The setting range is as follows: Resolution CL4NX CL6NX 203 dpi (1 dot = 0.125 mm (0.0049")) -30 to +30 dots -30 to +30 dots 305 dpi (1 dot = 0.083 mm (0.0033")) -45 to +45 dots -45 to +45 dots 609 dpi (1 dot = 0.042 mm (0.0017")) -90 to +90 dots - 6. Press thebutton to save the setting value. 7. Press thebutton to change to Offline mode. 8. Press thebutton again to change to Online mode. You can print to check the adjusted print position.[01-01534-EN]