Applicable models: CL4NX/6NX
Please refer to the below.
Confirm and configure the LAN interface settings such as the IP address by using the All-In-One Tool.
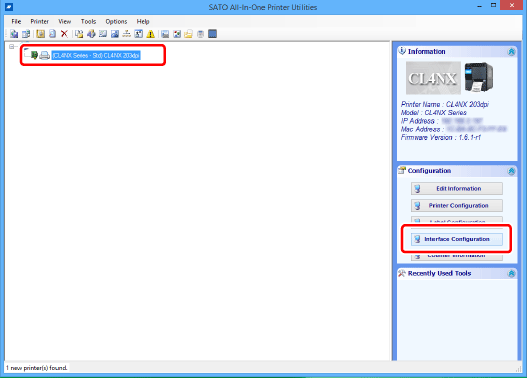
Confirm and configure the IP address of the product, which is added to the All-In-One Tool, from the[Interface Configuration]in the[Configuration]panel.
When you add the product to the All-In-One Tool, you can manage and monitor the product.
|
|
|
•
|
If the product's[Settings]>[Interface]>[Network]>[Advanced]>[Firewall]>[Enable]menu is set to[Enabled],[Settings]>[Interface]>[Network]>[Advanced]>[Firewall]>[Allow Services and Ports]> [SATO All-In-One Tool]must be set to[Enabled].
|
|
|
1.
|
Connect the LAN cable to the product, and power on the product.
|
Make sure that the LED of the product's LAN connector is lit.
|
2.
|
Activate[SATO]>[SATO All-In-One Application]on the computer.
|
|
3.
|
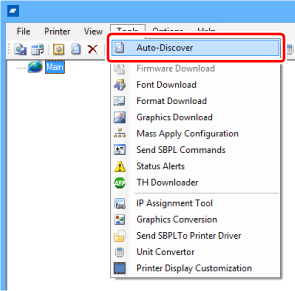
Select[Auto-Discover]from the[Tools]menu on the main screen.
|
The product is shown on the main screen.
|
|
|
•
|
If it is not detected, try to add it manually from[Add new printer]. If it is still not detected, try the following.
|
|
◦
|
Check that the product is powered on.
|
|
◦
|
Make sure that the LED of the LAN connector is lit.
|
|
◦
|
Check that the computer and product you are using are connected to the network.
|
|
◦
|
Directly connect the computer and product with a LAN cross cable, or disconnect it from the hub cascade and make it a local LAN environment.
|
|
Adding the Product Manually from[Add new printer]
|
a.
|
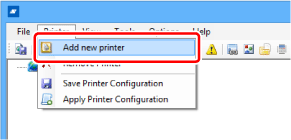
Select[Add new printer]from the[Printer]menu on the main screen.
|
|
b.
|
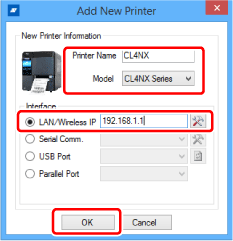
Enter[Printer Name], and select the model name of the product from the[Model]drop down list.
|
|
c.
|
Enter the IP address of the product into[LAN/Wireless IP], and click[OK].
|
|
|
|
•
|
When confirming or changing the port number, click the icon on the right side of the IP address input column to show the[LAN / Serial Comm. Port Setting]screen.
|
|
•
|
You can check the current IP address of the product in the[Information]menu of the Settings menu of the product.
|
|
The product is added to the main screen.
|
4.
|
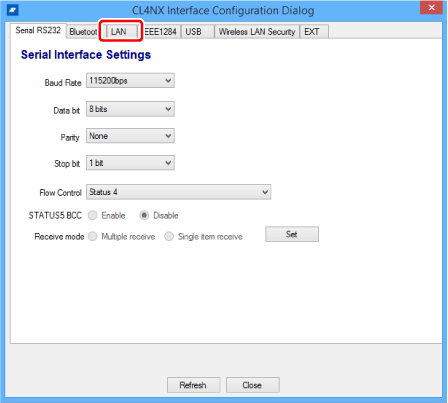
Select the product on the main screen, and click[Interface Configuration].
|
|
6.
|
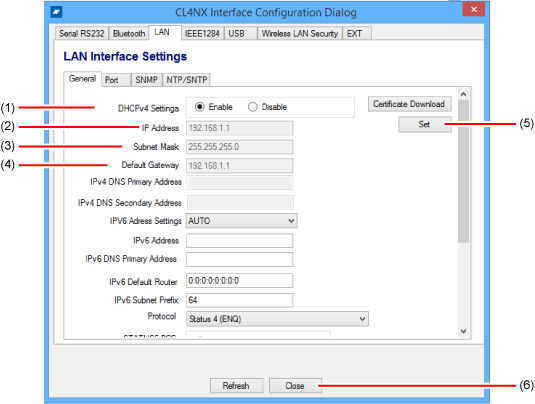
Select or enter the LAN settings as necessary.
|
(1) When you select[Enable], the IP address which is assigned from the DHCP server becomes available. You cannot set the IP address, subnet mask, or default gateway address. When you set the IP address manually, select[Disable].
(2) Specify the IP address.
(3) Specify the subnet mask.
(4) Specify the default gateway address.
(5) The settings on the screen will be sent when you enter the LAN settings (such as the IP address) and click[Set].
(6) Close the interface settings screen.
|
|
|
•
|
In the initial value of the LAN settings, the DHCP is enabled.
|
|
[03-01619-EN]